Honeywell TH5220D1029 Thermostat: A Comprehensive Guide
This guide details the FocusPRO TH5000 series, a non-programmable digital thermostat, offering installation, operation, and troubleshooting for the TH5220D1029 model.
Overview of the Honeywell TH5220D1029
The Honeywell TH5220D1029 is a widely utilized, non-programmable digital thermostat belonging to the FocusPRO TH5000 series. Designed for reliable and straightforward temperature control, it’s a legacy product now supported by Resideo, meaning it’s no longer in current production but remains a functional choice for many homes.
This thermostat offers essential heating and cooling management with features like auto changeover, seamlessly switching between heating and cooling modes to maintain a consistent temperature. It’s known for its simple interface and ease of use, making it suitable for users who prefer a basic, no-frills thermostat experience. The TH5220D1029 is compatible with a range of heating and cooling systems, and detailed instructions for installation and operation are available in the accompanying owner’s manual.
Users can find comprehensive resources, including a downloadable PDF manual, on the Honeywell Home support website for assistance with setup, troubleshooting, and understanding its functionalities.
Key Features and Specifications
The Honeywell TH5220D1029 FocusPRO thermostat boasts several key features. It’s a non-programmable, digital thermostat offering simple, consistent temperature control. A prominent feature is its auto changeover capability, automatically switching between heating and cooling to maintain the set temperature. The thermostat utilizes a clear display screen for easy readability of current and set temperatures.
Regarding specifications, the TH5220D1029 requires battery power, with recommended annual battery replacements. It’s designed for standard 24V heating and cooling systems. While specific detailed technical specifications aren’t readily available due to its legacy status, it supports basic system configurations.
The thermostat’s straightforward design prioritizes ease of use over advanced features, making it ideal for those seeking a reliable and uncomplicated temperature management solution. It’s a robust and dependable option for maintaining comfortable home temperatures.
Installation Guide
Proper installation involves careful wiring, secure mounting, and correct battery placement, ensuring optimal performance of the Honeywell TH5220D1029 thermostat.
Wiring Diagrams and Connections
Carefully disconnect power before beginning any wiring. The Honeywell TH5220D1029 utilizes standard thermostat wiring; however, proper identification is crucial. Typically, Rh connects to the heating power, Rc to cooling power, W to heat, Y to cool, and G to the fan. A common wire (C) is often required for consistent power.
Consult the provided wiring diagram – often available via Honeywell Home Depot resources – to match your existing system’s wiring to the thermostat terminals. Incorrect wiring can damage the thermostat or your HVAC system. If you encounter a wiring configuration not covered in the manual, or are unsure about any connection, consult a qualified HVAC technician.
Ensure wires are securely fastened to the terminals, avoiding loose connections. Double-check all connections before restoring power. A secure and accurate wiring setup is fundamental for correct thermostat operation.
Battery Installation and Replacement
The Honeywell TH5220D1029 thermostat requires batteries for operation, even when a common (C) wire is connected. To install batteries, locate the battery compartment, typically accessed by gently pulling the thermostat face away from the baseplate. Insert two AA alkaline batteries, observing the correct polarity (+ and -) as indicated inside the compartment.
A low battery indicator will appear on the display when replacement is needed. Replacing batteries annually is recommended, even if the low battery indicator hasn’t illuminated, to ensure uninterrupted operation. Use only fresh, alkaline batteries for optimal performance. Avoid mixing old and new batteries.
After replacing the batteries, reattach the thermostat face securely to the baseplate. Proper battery installation guarantees accurate temperature readings and reliable system control.
Mounting the Thermostat
Before mounting, ensure the thermostat is compatible with your heating and cooling system and that all wiring connections are complete and secure. The baseplate should be mounted to a wall, avoiding direct sunlight, drafts, or areas near heat-generating appliances. Use the provided screws and wall anchors if necessary for a stable installation.
Once the baseplate is securely fastened, carefully align the thermostat body with the baseplate and gently snap it into place. Verify that the thermostat is firmly attached and level. Incorrect mounting can affect temperature readings and system performance.
Double-check all wiring connections before fully securing the thermostat. A properly mounted thermostat ensures accurate temperature control and reliable operation of your HVAC system.
Programming the Thermostat
The TH5220D1029 is a non-programmable thermostat; adjustments involve setting the current date, time, and desired temperature for consistent comfort.
Setting the Current Date and Time

To set the date and time on your Honeywell TH5220D1029 thermostat, begin by pressing the ‘Menu’ button. Navigate through the options using the up and down arrow buttons until you reach the ‘Date’ setting.
Once selected, use the arrow buttons to adjust the month, day, and year. Confirm each selection by pressing the ‘Menu’ button again. Repeat this process for the ‘Time’ setting, adjusting the hour and minute.
The thermostat operates on a 24-hour clock format. Ensure accuracy, as the correct date and time are crucial for proper system operation, although this model doesn’t utilize scheduling.
After setting both the date and time, press the ‘Menu’ button one final time to save your changes and return to the main display screen.
Temperature Adjustment and Override
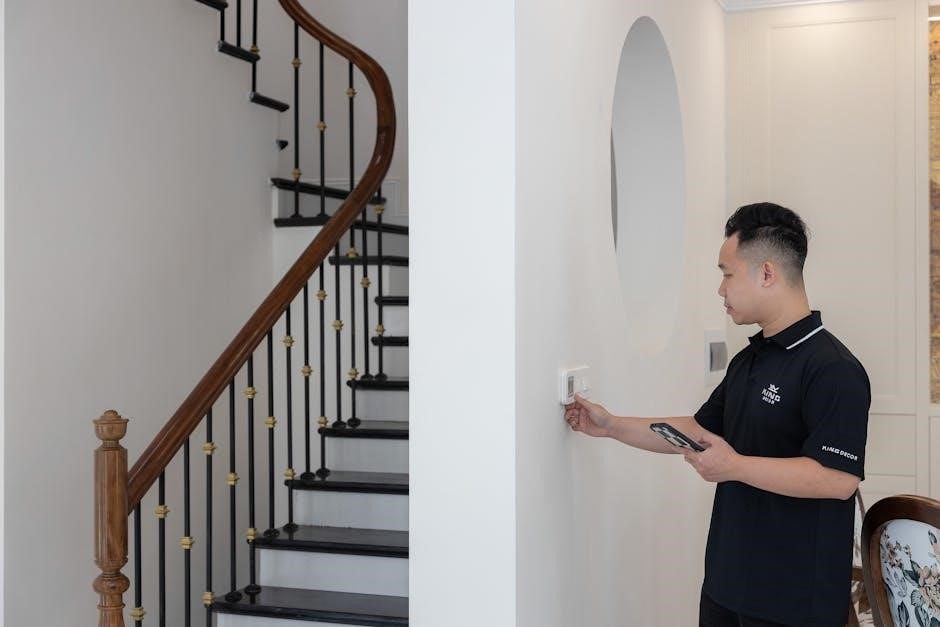
The Honeywell TH5220D1029 allows for simple temperature adjustments using the up and down arrow buttons on the thermostat’s face. Pressing the ‘up’ arrow increases the setpoint temperature, while the ‘down’ arrow decreases it.
This model features a temporary override function. Adjusting the temperature will immediately activate a hold, maintaining the new setpoint until the next scheduled change – though this is a non-programmable model, so it will hold indefinitely.
To cancel the hold and revert to the previously set temperature, simply adjust the temperature back to the original setting.
The display clearly shows the current room temperature alongside the setpoint temperature, providing easy monitoring and control of your home’s climate.
Understanding Auto Changeover
The Honeywell TH5220D1029 thermostat offers an ‘Auto Changeover’ feature, intelligently switching between heating and cooling modes to maintain a consistent temperature without manual intervention.
When enabled, the thermostat automatically determines whether to activate the heating or cooling system based on the difference between the setpoint and the actual room temperature.
This eliminates the need to manually switch between ‘Heat’ and ‘Cool’ modes as the weather changes, providing convenient and efficient climate control.
However, it’s important to note that Auto Changeover requires a properly configured system with a common wire (C-wire) for optimal performance.
Consult a qualified HVAC technician if you are unsure about your system’s compatibility or the correct setup for Auto Changeover.
Operating the Thermostat
The Honeywell TH5220D1029 features a user-friendly display screen, system mode selection, and timer functions for convenient temperature control within your home.
Display Screen Navigation
The Honeywell TH5220D1029’s display screen provides essential information at a glance. It clearly shows the current room temperature, the set temperature, and the system mode – whether it’s in Heat, Cool, or Off mode. The screen also indicates if the fan is set to Auto or On. Understanding the icons is crucial for effective operation.
Navigating the thermostat is straightforward. The buttons allow you to adjust the set temperature up or down. The ‘Mode’ button cycles through the available system modes. The display will illuminate to confirm your selections. Pay attention to any error codes that might appear, as these indicate potential issues requiring troubleshooting. The screen’s simplicity ensures ease of use for all household members, providing clear and concise temperature control information.
Using the Timer Function
The Honeywell TH5220D1029, while a non-programmable thermostat, features a ‘light timer’ function for display illumination. This isn’t a scheduling timer for temperature control, but rather manages the backlight duration; Pressing any button activates the display light, and it will remain lit for a pre-set period.
The duration of the backlight can sometimes be adjusted through advanced settings, though this functionality may vary. The timer ensures the display isn’t constantly illuminated, conserving battery life. It’s important to note this isn’t a temperature programming feature; the TH5220D1029 maintains a constant setpoint until manually changed. For scheduled temperature adjustments, consider upgrading to a programmable Honeywell Home system.
System Mode Selection (Heat, Cool, Off)
The Honeywell TH5220D1029 allows you to select between Heat, Cool, and Off modes, controlling how the thermostat interacts with your HVAC system; Using the thermostat’s controls, you can choose ‘Heat’ to activate the heating system when the temperature drops below the setpoint. Selecting ‘Cool’ activates the cooling system when the temperature rises above the setpoint.
The ‘Off’ mode disables both heating and cooling, allowing for manual control or system shutdown. Auto changeover, if enabled, automatically switches between heating and cooling to maintain the desired temperature. Ensure the correct mode is selected based on the season and your comfort preferences. Incorrect mode selection will prevent the system from operating as intended.

Troubleshooting Common Issues
Common problems include the thermostat not powering on, incorrect temperature readings, or a failure of the heating/cooling system to respond as programmed.
Thermostat Not Powering On
If your Honeywell TH5220D1029 thermostat isn’t powering on, begin by verifying the battery installation. Ensure the batteries are fresh and correctly inserted, observing the proper polarity (+ and -).
Remove the thermostat from the wall plate and carefully inspect the batteries. Replace them annually for optimal performance. If new batteries don’t resolve the issue, check the circuit breaker or fuse controlling the HVAC system. A tripped breaker or blown fuse will cut power to the thermostat.
Confirm the wiring connections are secure at both the thermostat and the furnace/air handler. Loose wires can interrupt the power supply. If you’re uncomfortable working with electrical wiring, consult a qualified HVAC technician. Finally, ensure the thermostat is firmly seated on the wall plate to establish a proper electrical connection.
Incorrect Temperature Readings
If the Honeywell TH5220D1029 displays inaccurate temperatures, several factors could be at play. First, ensure the thermostat isn’t directly exposed to sunlight, drafts, or heat-generating appliances. These external influences can skew readings.
Verify the thermostat is level on the wall. An unlevel installation can affect temperature sensing. Also, check for obstructions blocking airflow around the thermostat. Dust accumulation inside the unit can also contribute to inaccuracies; gently clean the exterior with a soft cloth.
Consider the thermostat’s location relative to the room. Is it positioned on an exterior wall? If so, temperature fluctuations may be more pronounced. If issues persist, recalibrate the thermostat if the model supports it, or consult an HVAC professional for assistance.
Heating or Cooling Not Responding
When your Honeywell TH5220D1029 isn’t initiating heating or cooling, begin by verifying the system mode is correctly set to ‘Heat’ or ‘Cool’. Ensure the set temperature is appropriately higher (for heat) or lower (for cool) than the current room temperature.
Check the circuit breaker for your HVAC system; a tripped breaker will halt operation. Confirm the furnace or air conditioner has power and is functioning independently. Inspect the wiring connections at the thermostat and the HVAC unit, ensuring they are secure.
If the issue continues, the problem might lie within the HVAC system itself, requiring professional attention. A faulty furnace igniter or a refrigerant leak could be the cause.

Advanced Settings & Customization
Additional functions are adjustable to your preference, though availability depends on prior thermostat setup and system capabilities.
Adjusting Temperature Differential
The temperature differential setting controls how much the temperature must deviate from the setpoint before the heating or cooling system activates. This impacts comfort and energy efficiency; a smaller differential means more consistent temperatures but potentially more frequent system cycling. Conversely, a larger differential reduces cycling but may lead to more noticeable temperature swings.
While the TH5220D1029 is a non-programmable model, understanding this concept is crucial for optimizing performance. The factory default setting is typically around 1°F (0.6°C), but it’s often not directly adjustable by the user through the thermostat interface itself.
Adjustments often require advanced configuration knowledge or may be limited by the specific system wiring. Consult a qualified HVAC technician if you desire to modify this setting, as incorrect adjustments could negatively impact system operation or efficiency. Properly configured, the differential ensures optimal comfort and minimizes energy waste.
Filter Replacement Reminders
The Honeywell TH5220D1029 thermostat, being a non-programmable model, does not have a built-in filter replacement reminder function. Unlike more advanced Honeywell Home systems, it lacks the smart features to track runtime and proactively alert you when it’s time to change your air filter.
However, maintaining a clean air filter is vital for optimal HVAC system performance, air quality, and energy efficiency. It’s recommended to check your filter monthly and replace it every 1-3 months, depending on usage and environmental factors like dust or pets.
To implement a reminder system, rely on a manual calendar or a separate smart home device. Setting a recurring reminder on your phone or calendar ensures you don’t overlook this crucial maintenance task. A clean filter reduces strain on your system and lowers energy bills.

Compatibility and System Requirements
The TH5220D1029 works with standard 24V heating and cooling systems, but isn’t designed for integration with advanced Honeywell Home systems directly.
Compatible Heating and Cooling Systems
The Honeywell TH5220D1029 FocusPRO thermostat is designed to be broadly compatible with most standard 24-volt heating and cooling systems commonly found in residential settings. This includes forced air furnaces (gas, oil, electric), heat pumps, and central air conditioning systems. It supports single-stage and multi-stage heating and cooling configurations, offering flexibility for various home comfort needs.
However, it’s crucial to verify compatibility before installation, especially with more complex systems or those utilizing proprietary communication protocols. The thermostat is not designed for use with line voltage systems (110V/220V) or systems requiring a C-wire (common wire) unless a C-wire adapter is installed. It’s also important to note that advanced features like zoning or smart home integration may require additional components or a different thermostat model.
Always consult a qualified HVAC technician if you are unsure about the compatibility of the TH5220D1029 with your specific heating and cooling system.
Integration with Honeywell Home Systems
While the Honeywell TH5220D1029 is a standalone, non-programmable thermostat, it can be a stepping stone towards a more connected home experience within the Honeywell Home ecosystem. Although it doesn’t directly connect to Wi-Fi or the Honeywell Home app, it provides a reliable and consistent temperature control foundation.
For full smart home integration, consider upgrading to a Honeywell Home Smart Thermostat (like the RTH9585WF) which seamlessly connects to the Honeywell Home app, allowing remote control, scheduling, and voice assistant compatibility. The TH5220D1029’s wiring can often be reused during the upgrade, simplifying the process.
The Honeywell Home system offers features like geofencing, learning algorithms, and energy reports, enhancing comfort and efficiency. Visit yourhome.honeywell.com for details on compatible products and system requirements.
Manual Resources and Support
Access the TH5220D1029 manual in PDF format online, or visit the Honeywell Home Support website for FAQs and assistance with your thermostat.
Downloading the TH5220D1029 Manual (PDF)
Obtaining a digital copy of the Honeywell TH5220D1029 thermostat’s manual is straightforward and provides a readily accessible resource for all your reference needs. A PDF version of the owner’s manual, specifically the 69-1923EFS-01 edition, is available for download, offering detailed instructions on operation, installation, and troubleshooting.
This comprehensive document covers the FocusPRO TH5000 series, ensuring you have the information required to effectively manage your heating and cooling system. The manual details battery replacement procedures (recommended annually), system mode selection, and understanding the thermostat’s display screen.
You can find a direct link to the PDF manual through various online retailers, such as Home Depot, and directly from Resideo, the supporting entity for this legacy product. Having the manual readily available allows for quick answers to common questions and ensures optimal performance of your TH5220D1029 thermostat.
Honeywell Home Support Website
For comprehensive assistance with your Honeywell TH5220D1029 thermostat, the Honeywell Home support website (yourhome.honeywell.com) serves as a central hub for resources and troubleshooting. While the TH5220D1029 is a legacy product no longer manufactured, Honeywell continues to provide support materials for existing users.
The website offers access to frequently asked questions (FAQs), troubleshooting guides, and potentially archived manuals. You can search for specific issues or browse through categorized support articles to find solutions tailored to your thermostat.
This online platform is an invaluable tool for diagnosing problems, understanding thermostat functions, and maximizing the efficiency of your heating and cooling system. It’s recommended to visit yourhome.honeywell.com for the most up-to-date information and support options related to your Honeywell TH5220D1029.
Frequently Asked Questions (FAQ)
Here are some common questions regarding the Honeywell TH5220D1029 FocusPRO thermostat. Why isn’t my thermostat powering on? Ensure batteries are fresh and correctly installed; replace annually. Is the display dim? Check battery levels, as low power can affect brightness. Why isn’t the heat/cool responding? Verify proper wiring and system mode selection (Heat, Cool, Off).
Can I reset the thermostat? While a full factory reset isn’t typically available, removing and reinstalling batteries can sometimes resolve minor issues. What does ‘Auto Changeover’ do? It automatically switches between heating and cooling to maintain a set temperature.
Where can I find the full manual? Download the PDF from Honeywell’s website or search online for “Honeywell TH5220D1029 manual”. Remember this is a legacy product, so support may be limited.