
Welcome! This comprehensive guide assists new and experienced photographers in mastering the Nikon D200’s capabilities. Explore detailed settings for diverse photography styles, from nature to portraits.
What is the Nikon D200?
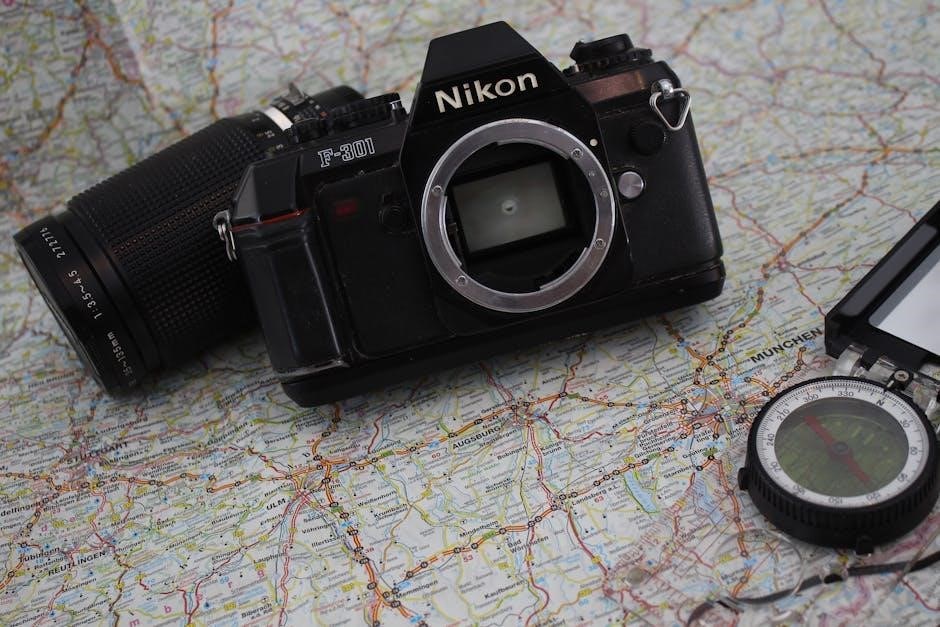
The Nikon D200, released in 2005, is a professional-grade digital single-lens reflex (SLR) camera renowned for its exceptional image quality and robust build. It bridges the gap between Nikon’s enthusiast and professional lines, offering features previously found only in more expensive models. This 10.2-megapixel camera boasts a large APS-C sized sensor, delivering detailed and vibrant photographs.

Designed for serious amateur and professional photographers, the D200 excels in various shooting scenarios, including landscapes, portraits, sports, and photojournalism. Its advanced autofocus system, coupled with a wide range of customizable settings, provides precise control over image capture. The camera’s durable construction ensures reliability in demanding conditions.
The D200’s user manual is a vital resource, offering detailed explanations of its functions and features. Nikon also provides the Nikon Manual Viewer 2 app for convenient access to the PDF manual on mobile devices.
Key Features and Specifications
The Nikon D200 features a 10.2-megapixel DX-format CCD sensor, delivering high-resolution images with excellent detail. It offers a continuous shooting speed of up to 5 frames per second, ideal for capturing fast-action sequences. Its 11-point autofocus system ensures sharp focus across a wide area of the frame.
Key specifications include a 2.5-inch LCD screen for image review and menu navigation, and compatibility with a wide range of Nikon DX-format lenses. The camera supports both RAW and JPEG image formats, providing flexibility in post-processing. It also features multiple Picture Control settings (Standard, Neutral, Vivid, etc.) for customized image rendering.
The D200’s robust body is built to withstand challenging shooting conditions. Access to the comprehensive user manual, available as a PDF, is crucial for understanding its full potential. The Nikon Manual Viewer 2 app provides convenient mobile access.
Target Audience for this Guide
This Nikon D200 user guide is designed for a broad audience, ranging from photography enthusiasts upgrading from entry-level DSLRs to experienced photographers seeking a reliable and capable second body. It caters to individuals wanting to move beyond automatic modes and explore the creative control offered by a more advanced camera.
Whether you’re a hobbyist passionate about landscape, portrait, or sports photography, this guide will help you unlock the D200’s full potential. It’s also beneficial for those new to Nikon’s system, providing a clear understanding of its controls, menus, and features.
We assume a basic understanding of photographic principles, but detailed explanations are provided. Accessing the official Nikon D200 manual (PDF) alongside this guide is recommended for comprehensive support. The Nikon Manual Viewer 2 app offers convenient mobile access to documentation.

Getting Started with Your D200
Begin your journey with unboxing, battery charging, and memory card insertion. This ensures your Nikon D200 is ready for capturing stunning images immediately!
Unboxing and Initial Setup
Carefully unpack your Nikon D200, verifying all included components are present. These typically include the camera body, battery, battery charger, strap, USB cable, and various manuals – including the comprehensive user guide. Before first use, fully charge the battery using the provided charger; This may take several hours, so plan accordingly.
Once charged, insert the battery into the battery compartment, ensuring it clicks securely into place. Next, locate the memory card slot and insert a compatible memory card (CompactFlash is required for the D200). The camera will likely prompt you to format the card; it’s recommended to do so, as this prepares it specifically for use with your D200.
Finally, attach the strap to the camera body for secure handling. Set the date and time on the camera, as this information is embedded in your images. You are now ready to begin exploring the features of your Nikon D200!
Battery and Charger Information
The Nikon D200 utilizes the EN-EL3a rechargeable lithium-ion battery. Ensure you only use the MH-E2A charger specifically designed for this battery type to prevent damage or malfunction. A full charge typically takes several hours, indicated by the charger’s light changing from blinking to solid.
Battery life varies depending on usage, but a fully charged EN-EL3a generally provides sufficient power for a substantial number of shots. Avoid exposing the battery to extreme temperatures or moisture. When storing the battery for extended periods, it’s best to charge it to approximately 50% to maintain its health.
Always disconnect the charger from the power outlet when not in use. Never attempt to disassemble or modify the battery or charger. Refer to the Nikon D200 manual for detailed safety precautions and troubleshooting tips regarding battery and charging issues.
Inserting Memory Cards
The Nikon D200 supports CompactFlash (CF) Type I memory cards. Locate the memory card slot on the camera’s side; it’s typically covered by a protective door. Gently open the door and insert the CF card, ensuring the label faces the same direction as the camera’s rear screen. Push the card in until it clicks into place – do not force it.
To remove the card, gently push it in once more to release the locking mechanism, then pull it out. Avoid touching the metal contacts on the card. Always format new memory cards within the camera before first use to ensure compatibility and optimal performance.
Be cautious when handling memory cards, as static electricity can potentially damage them. Back up your images regularly to a computer or external storage device to prevent data loss. Refer to the camera’s manual for specific recommendations on compatible CF card brands and speeds.

Understanding the Camera Controls
Familiarize yourself with the D200’s mode dial, buttons, and dials for seamless operation. Mastering the menu system unlocks customization and advanced features for optimal control.
The Mode Dial: Exploring Shooting Modes
The Nikon D200’s mode dial is your primary gateway to controlling how the camera captures images. Understanding each mode is crucial for achieving desired results. Auto mode simplifies shooting, letting the camera handle all settings. Program (P) mode offers a balance, allowing some user control while the camera manages aperture and shutter speed.
Aperture Priority (A or Av) lets you set the aperture, influencing depth of field, while the camera determines shutter speed. Conversely, Shutter Priority (S or Tv) allows you to control shutter speed, freezing or blurring motion, with the camera adjusting aperture. Manual (M) mode grants full control over both aperture and shutter speed, ideal for experienced photographers.
Additional modes include Portrait, optimized for capturing flattering portraits with blurred backgrounds; Landscape, designed for sharp, detailed landscapes; Sports, prioritizing fast shutter speeds to freeze action; and Close-up, for macro photography. Scene modes offer pre-defined settings for specific situations, simplifying complex adjustments; Experimenting with each mode will unlock the D200’s full potential.
Buttons and Dials: A Comprehensive Overview
The Nikon D200 features a thoughtfully designed control layout. The main command dial adjusts settings like aperture, shutter speed, and exposure compensation. The sub-command dial offers secondary control, often used in conjunction with other buttons. The AF/M switch on both the camera body and lens selects autofocus or manual focus.
The Fn button provides quick access to customizable functions, streamlining your workflow. The Menu button opens the camera’s extensive menu system for detailed settings adjustments. The Info button toggles between different information displays on the LCD screen. The playback button allows reviewing captured images.
Dedicated buttons control white balance, ISO, image quality, and metering mode. The ten-key pad on the rear facilitates direct input of numerical values. Understanding the function of each button and dial is essential for efficient operation. Familiarize yourself with their placement and purpose to navigate the D200’s controls with confidence and precision.
Navigating the Menu System
The Nikon D200’s menu system is logically organized into several tabs: Setup, Shooting, Recording, Playback, and Custom Settings. Access it via the Menu button. Use the multi-selector (directional pad) to navigate through the menus and submenus. Pressing OK selects the highlighted option.
The Setup menu handles general camera settings like language, date/time, and display options. The Shooting menu controls autofocus, metering, and drive modes. Recording manages image quality, size, and white balance. Playback adjusts image review settings.
Custom Settings allows personalized camera configuration, storing preferred settings for quick recall. The menu structure can seem complex initially, but exploring each section methodically will reveal its depth. Refer to the comprehensive D200 manual (available as a PDF) for detailed explanations of each menu item and its function. Mastering the menu system unlocks the camera’s full potential.

Focusing and Exposure
Achieve sharp images with autofocus or manual control. Explore aperture priority, shutter priority, and manual exposure modes for creative control over your photographs.
Autofocus Modes: Single, Continuous, and Dynamic Area
The Nikon D200 offers versatile autofocus (AF) modes to suit various shooting scenarios. Single-area AF (AF-S) is ideal for stationary subjects; the camera focuses once when you half-press the shutter button, locking focus until you shoot. This is perfect for portraits or landscapes.
Continuous-area AF (AF-C) tracks moving subjects, continuously adjusting focus as they move. Use this for sports, wildlife, or any action photography where the subject isn’t still. The camera predicts the subject’s movement for consistent sharpness.
Dynamic-area AF combines elements of both. You select an AF point, but the camera also considers surrounding points to maintain focus even if the subject briefly moves outside the initial point. This offers a balance between precision and tracking ability. Experiment with different dynamic-area settings (9, 21, or 37 points) to find what works best for your subject and shooting style. Remember to select the appropriate AF mode based on your subject’s movement and your desired outcome.
Manual Focus Operation
The Nikon D200 allows precise manual focus control. First, ensure the AF/M switch on your lens is set to ‘M’ for manual. Then, rotate the focusing ring on the lens itself to achieve sharpness. Viewing the image through the viewfinder and utilizing the focus confirmation indicator (a small dot in the viewfinder) is crucial for accurate focusing.
When the focus confirmation dot illuminates, your subject is in focus. Some lenses may not have this feature, requiring careful visual assessment. If using Live View, you can zoom in on the image to critically assess sharpness. Remember that autofocus overrides manual focus if the shutter button is pressed halfway when AF is enabled.
Manual focus is particularly useful in low-light situations or when the autofocus system struggles to lock onto a subject. Practice makes perfect – become comfortable with the feel of the focusing ring and the visual cues to achieve consistently sharp images. Don’t hesitate to switch back and forth between AF and MF as needed.
Exposure Modes: Aperture Priority, Shutter Priority, and Manual
The Nikon D200 offers versatile exposure control through Aperture Priority (A), Shutter Priority (S), and Manual (M) modes. In Aperture Priority, you select the aperture (f-stop) controlling depth of field, and the camera automatically sets the shutter speed. This is ideal for portraits or landscapes.
Shutter Priority allows you to choose the shutter speed, freezing or blurring motion, while the camera adjusts the aperture. Perfect for sports or capturing light trails. Manual mode grants full control over both aperture and shutter speed, demanding a thorough understanding of the exposure triangle.
Use the exposure compensation dial to fine-tune exposure in A and S modes. The camera’s meter provides a baseline, but artistic vision often requires adjustments. Mastering these modes unlocks creative potential, allowing you to intentionally manipulate light and achieve desired photographic effects. Experiment to discover what works best for your style!

Image Quality and Settings
Optimize your D200 images by understanding size, quality options, and white balance. Utilize Picture Control settings—Standard, Neutral, Vivid—to tailor color rendition to your vision.

Understanding Image Size and Quality Options
The Nikon D200 offers a range of image size and quality settings, directly impacting file size and detail. Larger images, captured at higher resolutions (like Large, 3008 x 2000 pixels), contain more detail and are ideal for significant cropping or large prints. However, they consume more memory card space.
Quality settings determine the level of JPEG compression applied. “Fine” provides the highest quality with minimal compression, resulting in larger file sizes. “Normal” offers a balance between quality and file size, while “Basic” uses the highest compression, yielding the smallest files but with some potential loss of detail.
For maximum flexibility and editing potential, shooting in RAW format is recommended. RAW files retain all the data captured by the sensor, allowing for extensive post-processing adjustments without quality degradation. Keep in mind RAW files are significantly larger than JPEGs. Consider your storage capacity and workflow when choosing between these options.
Experiment with different settings to find the optimal balance between image quality, file size, and your specific photographic needs.
White Balance Settings for Accurate Colors
Achieving accurate colors is crucial for compelling photography, and the Nikon D200 provides comprehensive white balance controls. White balance adjusts for the color temperature of light sources, ensuring whites appear white and other colors are rendered faithfully.

The D200 offers several preset white balance modes, including Daylight, Cloudy, Fluorescent, and Tungsten, tailored to common lighting conditions. An Auto White Balance (AWB) setting attempts to determine the correct balance automatically, often performing well in consistent lighting.
For precise control, utilize the Custom White Balance feature. This allows you to manually set the white balance by photographing a white or gray card under the prevailing lighting conditions. This ensures the most accurate color rendition.
Additionally, the D200 allows for fine-tuning of white balance using the Kelvin temperature scale, offering granular control over color temperature. Experiment with these settings to achieve the desired look and ensure color accuracy in your images.
Picture Control Settings: Standard, Neutral, Vivid, etc.
Nikon’s Picture Control system allows you to customize the look of your images directly within the camera, influencing tone, contrast, and sharpness. The D200 offers several preset Picture Controls, each designed for specific photographic styles.
Standard provides a balanced, natural look suitable for a wide range of subjects. Neutral offers a flatter profile, ideal for post-processing flexibility. Vivid boosts saturation and contrast for eye-catching results, perfect for landscapes or vibrant scenes.
Other options include Portrait, optimized for skin tones, and Landscape, enhancing blues and greens. You can further customize these presets or create your own unique Picture Controls, adjusting parameters like sharpness, contrast, brightness, saturation, and hue.
Experimenting with Picture Controls allows you to achieve your desired aesthetic directly in-camera, reducing the need for extensive post-processing. Remember to consider the subject and lighting conditions when selecting a Picture Control.

Advanced Features and Techniques
Unlock the D200’s full potential! Explore built-in flash options, customize settings for specialized photography, and access the official Nikon D200 manual in PDF format.
Using the Built-in Flash
The Nikon D200’s built-in flash offers versatile lighting solutions for various shooting scenarios. To activate it, press the flash release button on the camera’s hot shoe and lift the flash unit. Several flash modes are available, selectable through the camera menu or directly via the flash control buttons.
Flash Modes Explained: TTL (Through-The-Lens) flash metering automatically calculates the correct flash exposure, ideal for general use. Manual flash allows precise control over flash power, useful for creative effects or challenging lighting. Red-eye reduction minimizes the red-eye effect in portraits. Fill-flash brightens shadows in backlit situations.
Flash Compensation: Fine-tune flash exposure using flash compensation. Positive values increase flash power, while negative values decrease it. Experiment to achieve the desired lighting balance. Remember to consider the distance to your subject and the room’s reflectivity when adjusting flash settings. The D200 also supports external flash units for more advanced lighting control.
Customizing Camera Settings for Specific Needs
The Nikon D200’s extensive customization options allow tailoring the camera to your individual shooting style and preferences. Dive into the menu system to personalize settings for optimal performance. You can create and save custom Picture Control settings – Standard, Neutral, Vivid, and more – to achieve desired color and contrast levels.
Fine-Tuning Autofocus: Adjust autofocus settings like focus area mode (Single, Continuous, Dynamic Area) to suit your subject. Customize button assignments for quicker access to frequently used functions. Modify the depth-of-field preview to visualize the final image before capturing it.
Personalized Display: Adjust the information displayed in the viewfinder and on the LCD screen. Set up custom shooting menus for streamlined access to essential settings. Saving these personalized setups as presets ensures consistent results across different shooting sessions, enhancing your workflow and creative control.
Accessing the Nikon D200 Manual (PDF) and Nikon Manual Viewer 2 App
For comprehensive support, Nikon provides a downloadable PDF version of the D200’s user manual; This allows offline access to detailed explanations of all camera functions and features. You can find the PDF manual through Nikon’s official website or authorized dealer support pages.
Furthermore, Nikon offers the Nikon Manual Viewer 2 app, available for both iOS (iPhone, iPad, iPod touch) and Android devices. This app provides convenient access to manuals directly on your smartphone or tablet. PDF files can be easily viewed using free software like Adobe Reader.
The app streamlines the learning process, offering a portable and searchable resource. Whether you’re on location or at home, having the manual readily available ensures you can quickly resolve any questions or explore advanced techniques, maximizing your D200 experience.